In this guide, we will walk through the steps to integrate the Initia Wallet Widget into a NextJS project. The completed webapp will allow users to connect their Initia Wallet as well as other wallets and perform a simple token transfer transaction to their own wallet.
First, we need to create a new template directory for our NextJS project.
bunx create-next-app@latest initia-wallet-widget
Select “Yes” for all of the configuration prompts except for “Would you like to customize the default import alias”.Once the project is created, navigate into the project directory and install the dependencies. For this tutorial, we will need to use 3 libraries:
@initia/react-wallet-widget: A React component that enables users to connect their Initia Wallet as well as other wallets.
@initia/initia.js: A JavaScript library to interact with the Initia blockchain and minitias, including querying user balances and signing and sending transactions
@cosmjs/proto-signing: A JavaScript library that allows us to sign encode Cosmos SDK messages for signing.
cd initia-wallet-widgetbun add @initia/react-wallet-widget @initia/initia.js @cosmjs/proto-signing
Once we have the project setup, we can start developing the frontend.
First, we need to add the WalletWidgetProvider to our project. This will allow us to use the useWallet hook to interact with the wallet. To do so, we need to import the WalletWidgetProvider from @initia/react-wallet-widget and wrap the children component in src/layout.tsx with it.
src/layout.tsx
import type { Metadata } from 'next';import { Inter } from 'next/font/google';import './globals.css';import { WalletWidgetProvider } from '@initia/react-wallet-widget'; // Import the WalletWidgetProviderconst inter = Inter({ subsets: ['latin'] });export const metadata: Metadata = { title: 'Create Next App', description: 'Generated by create next app',};const chainId = 'initiation-2';export default function RootLayout({ children,}: Readonly<{ children: React.ReactNode;}>) { return ( <html lang="en"> <body className={inter.className}> {/* Wrap the children component with the WalletWidgetProvider */} <WalletWidgetProvider chainId={chainId}>{children}</WalletWidgetProvider> </body> </html> );}
We can change the chainId to any chain that is in the initia-registry.
Once we have the WalletWidgetProvider in place, we can use the useWallet hook to interact with the wallet. We will do this by modifying src/page.tsx.First, we declare use client at the top of the file and import the necessary libraries and hooks.
src/page.tsx
'use client';import { useAddress, useWallet } from '@initia/react-wallet-widget';import { MsgSend } from '@initia/initia.js';import type { EncodeObject } from '@cosmjs/proto-signing';import type { Msg } from '@initia/initia.js';import { useState } from 'react';
useAddress: A hook that returns the address of the connected wallet.
useWallet: A hook that returns the wallet object.
MsgSend: A message type that is used to send tokens from one wallet to another.
EncodeObject: A type that is used to encode Cosmos SDK messages for signing.
Msg: A type that is used to represent a Cosmos SDK message.
useState: A hook that allows us to use state in our component.
Then, we need to create a function that will convert an array of messages of Msg type into an array of EncodeObject types.
view: A function that allows us to view the wallet.
requestTx: A function that allows us to request a transaction from the wallet.
isLoading: A state variable that indicates whether the transaction is being requested.
transactionHash: A state variable that stores the transaction hash.
Then, we implement a send function that will send a transaction to the wallet. The function will check if the wallet is connected, and if it is, it will request a transaction to send 1000000 uinit (1 INIT) from the wallet to itself.
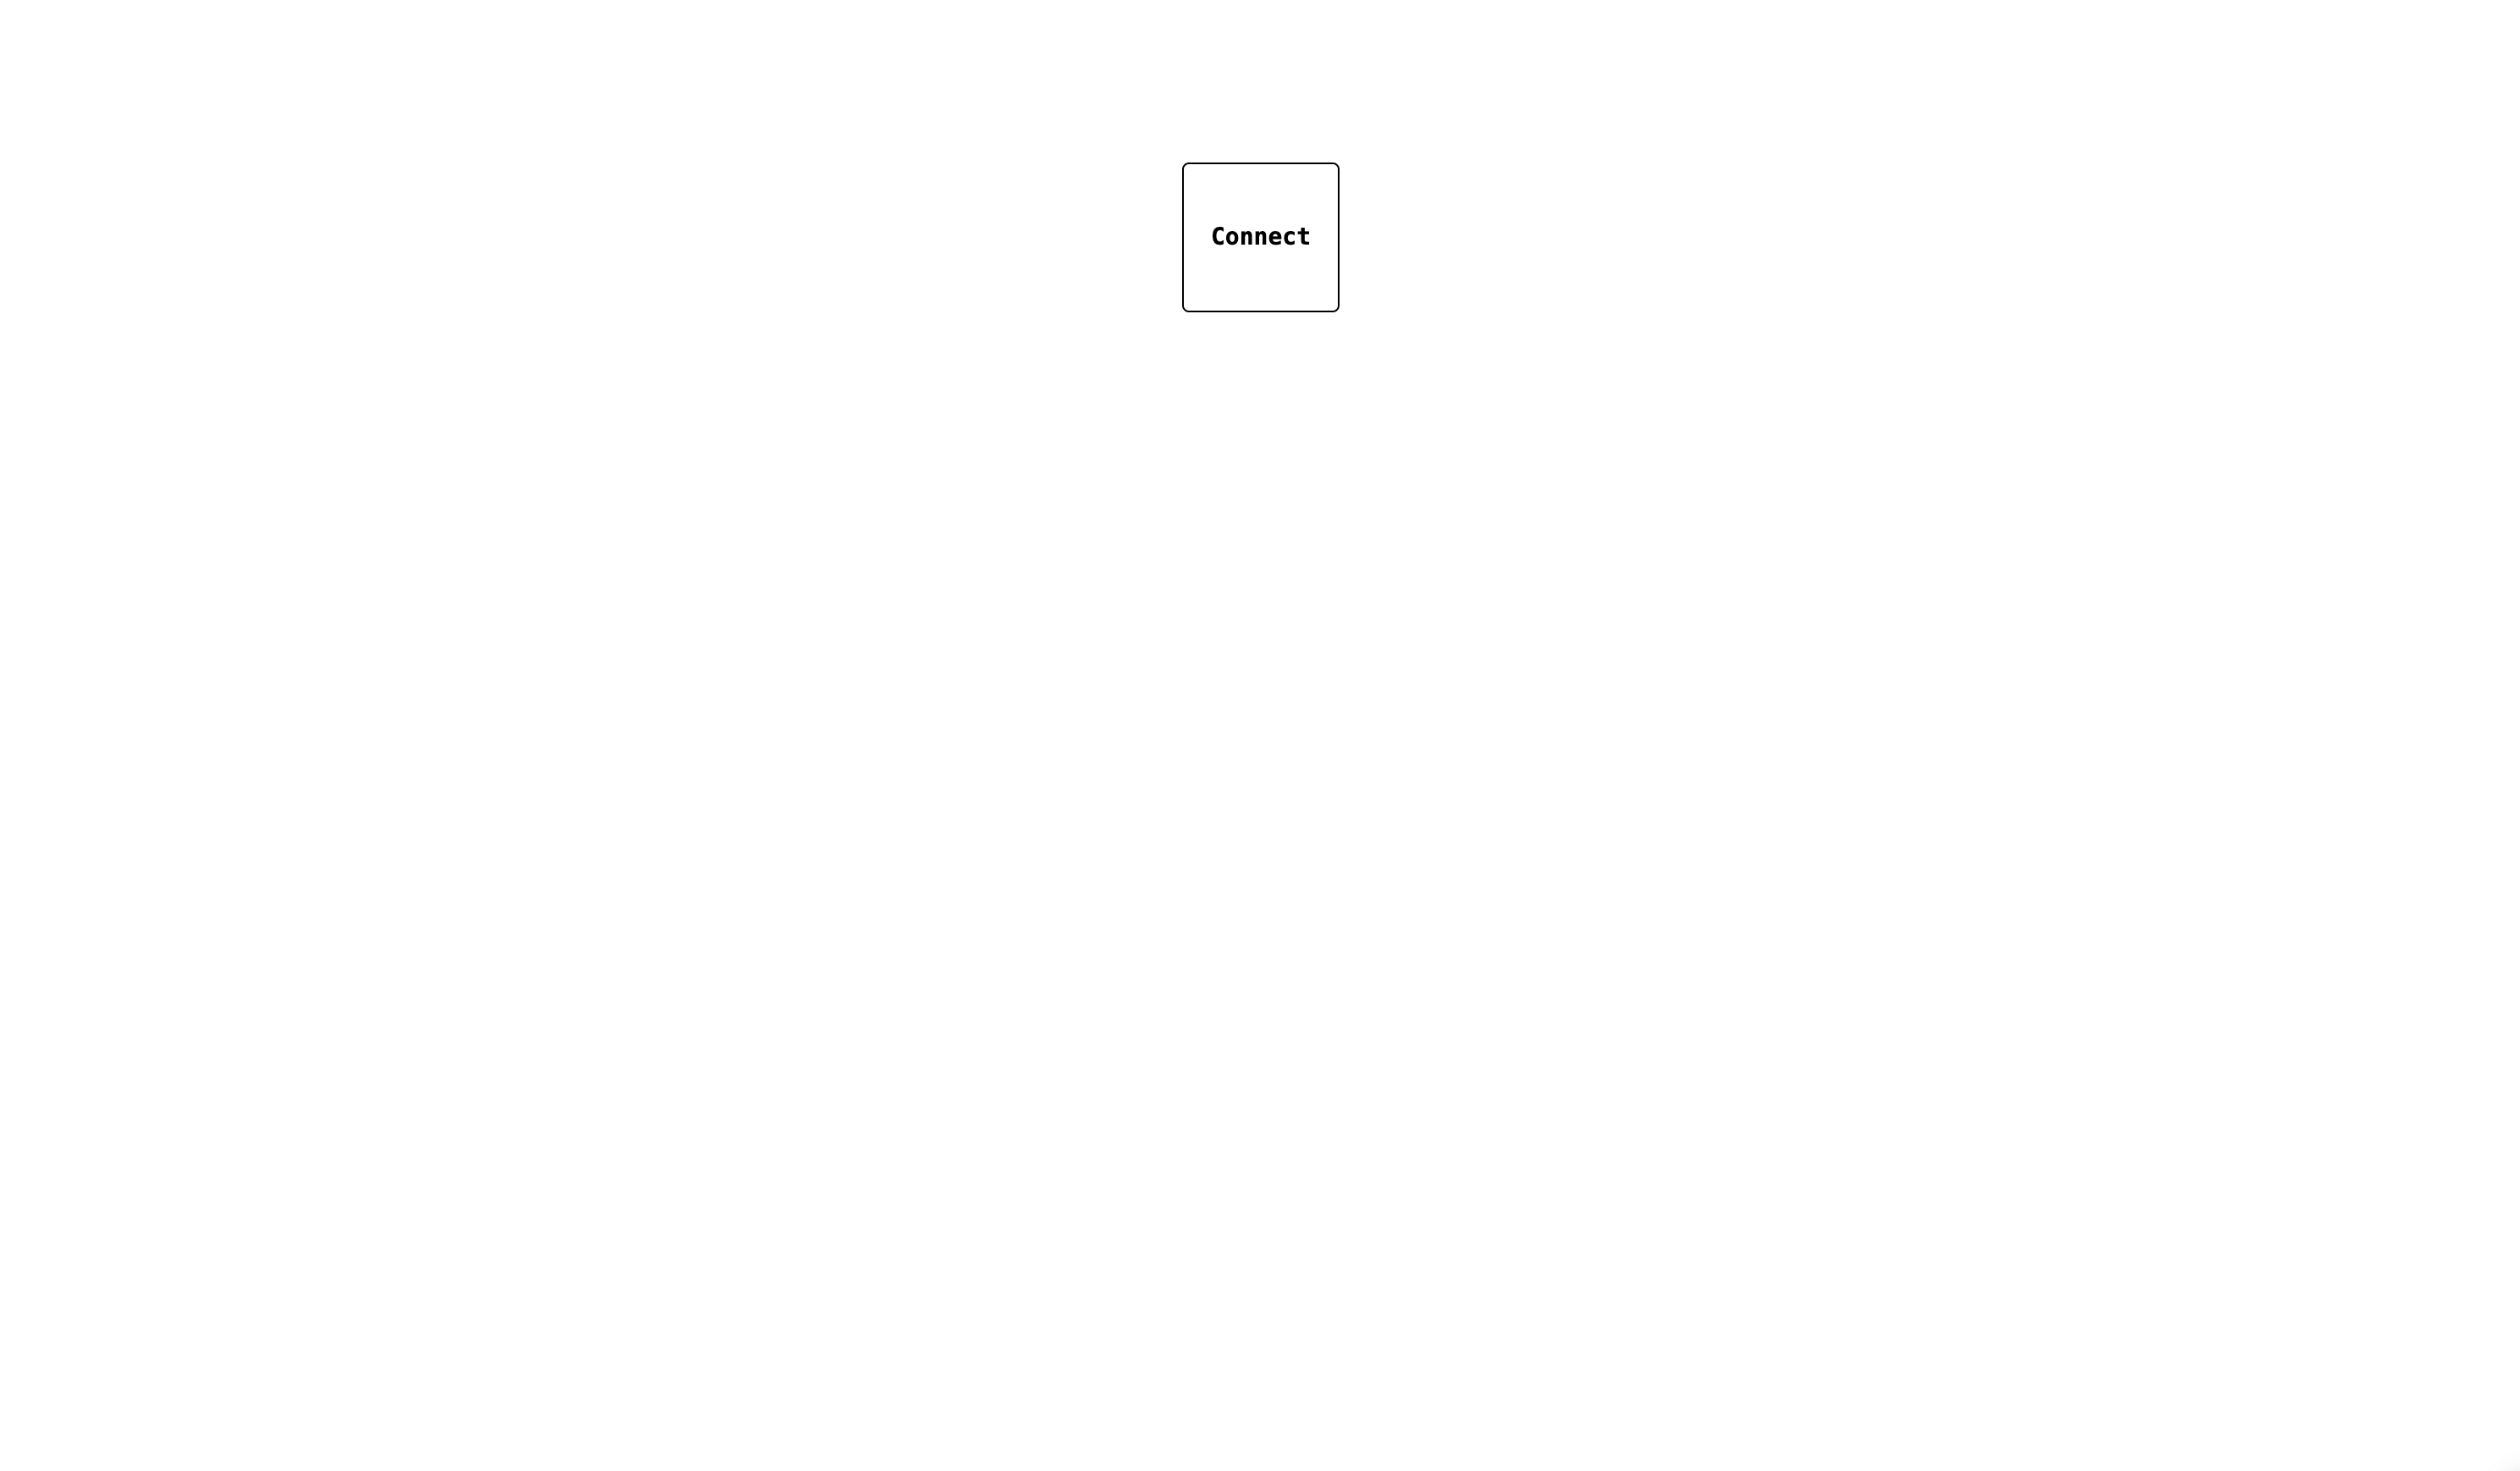
You can then run the project with bun run dev and navigate to http://localhost:3000 to see the project in action. If everything is working correctly, you should see a an interface similar to the following:
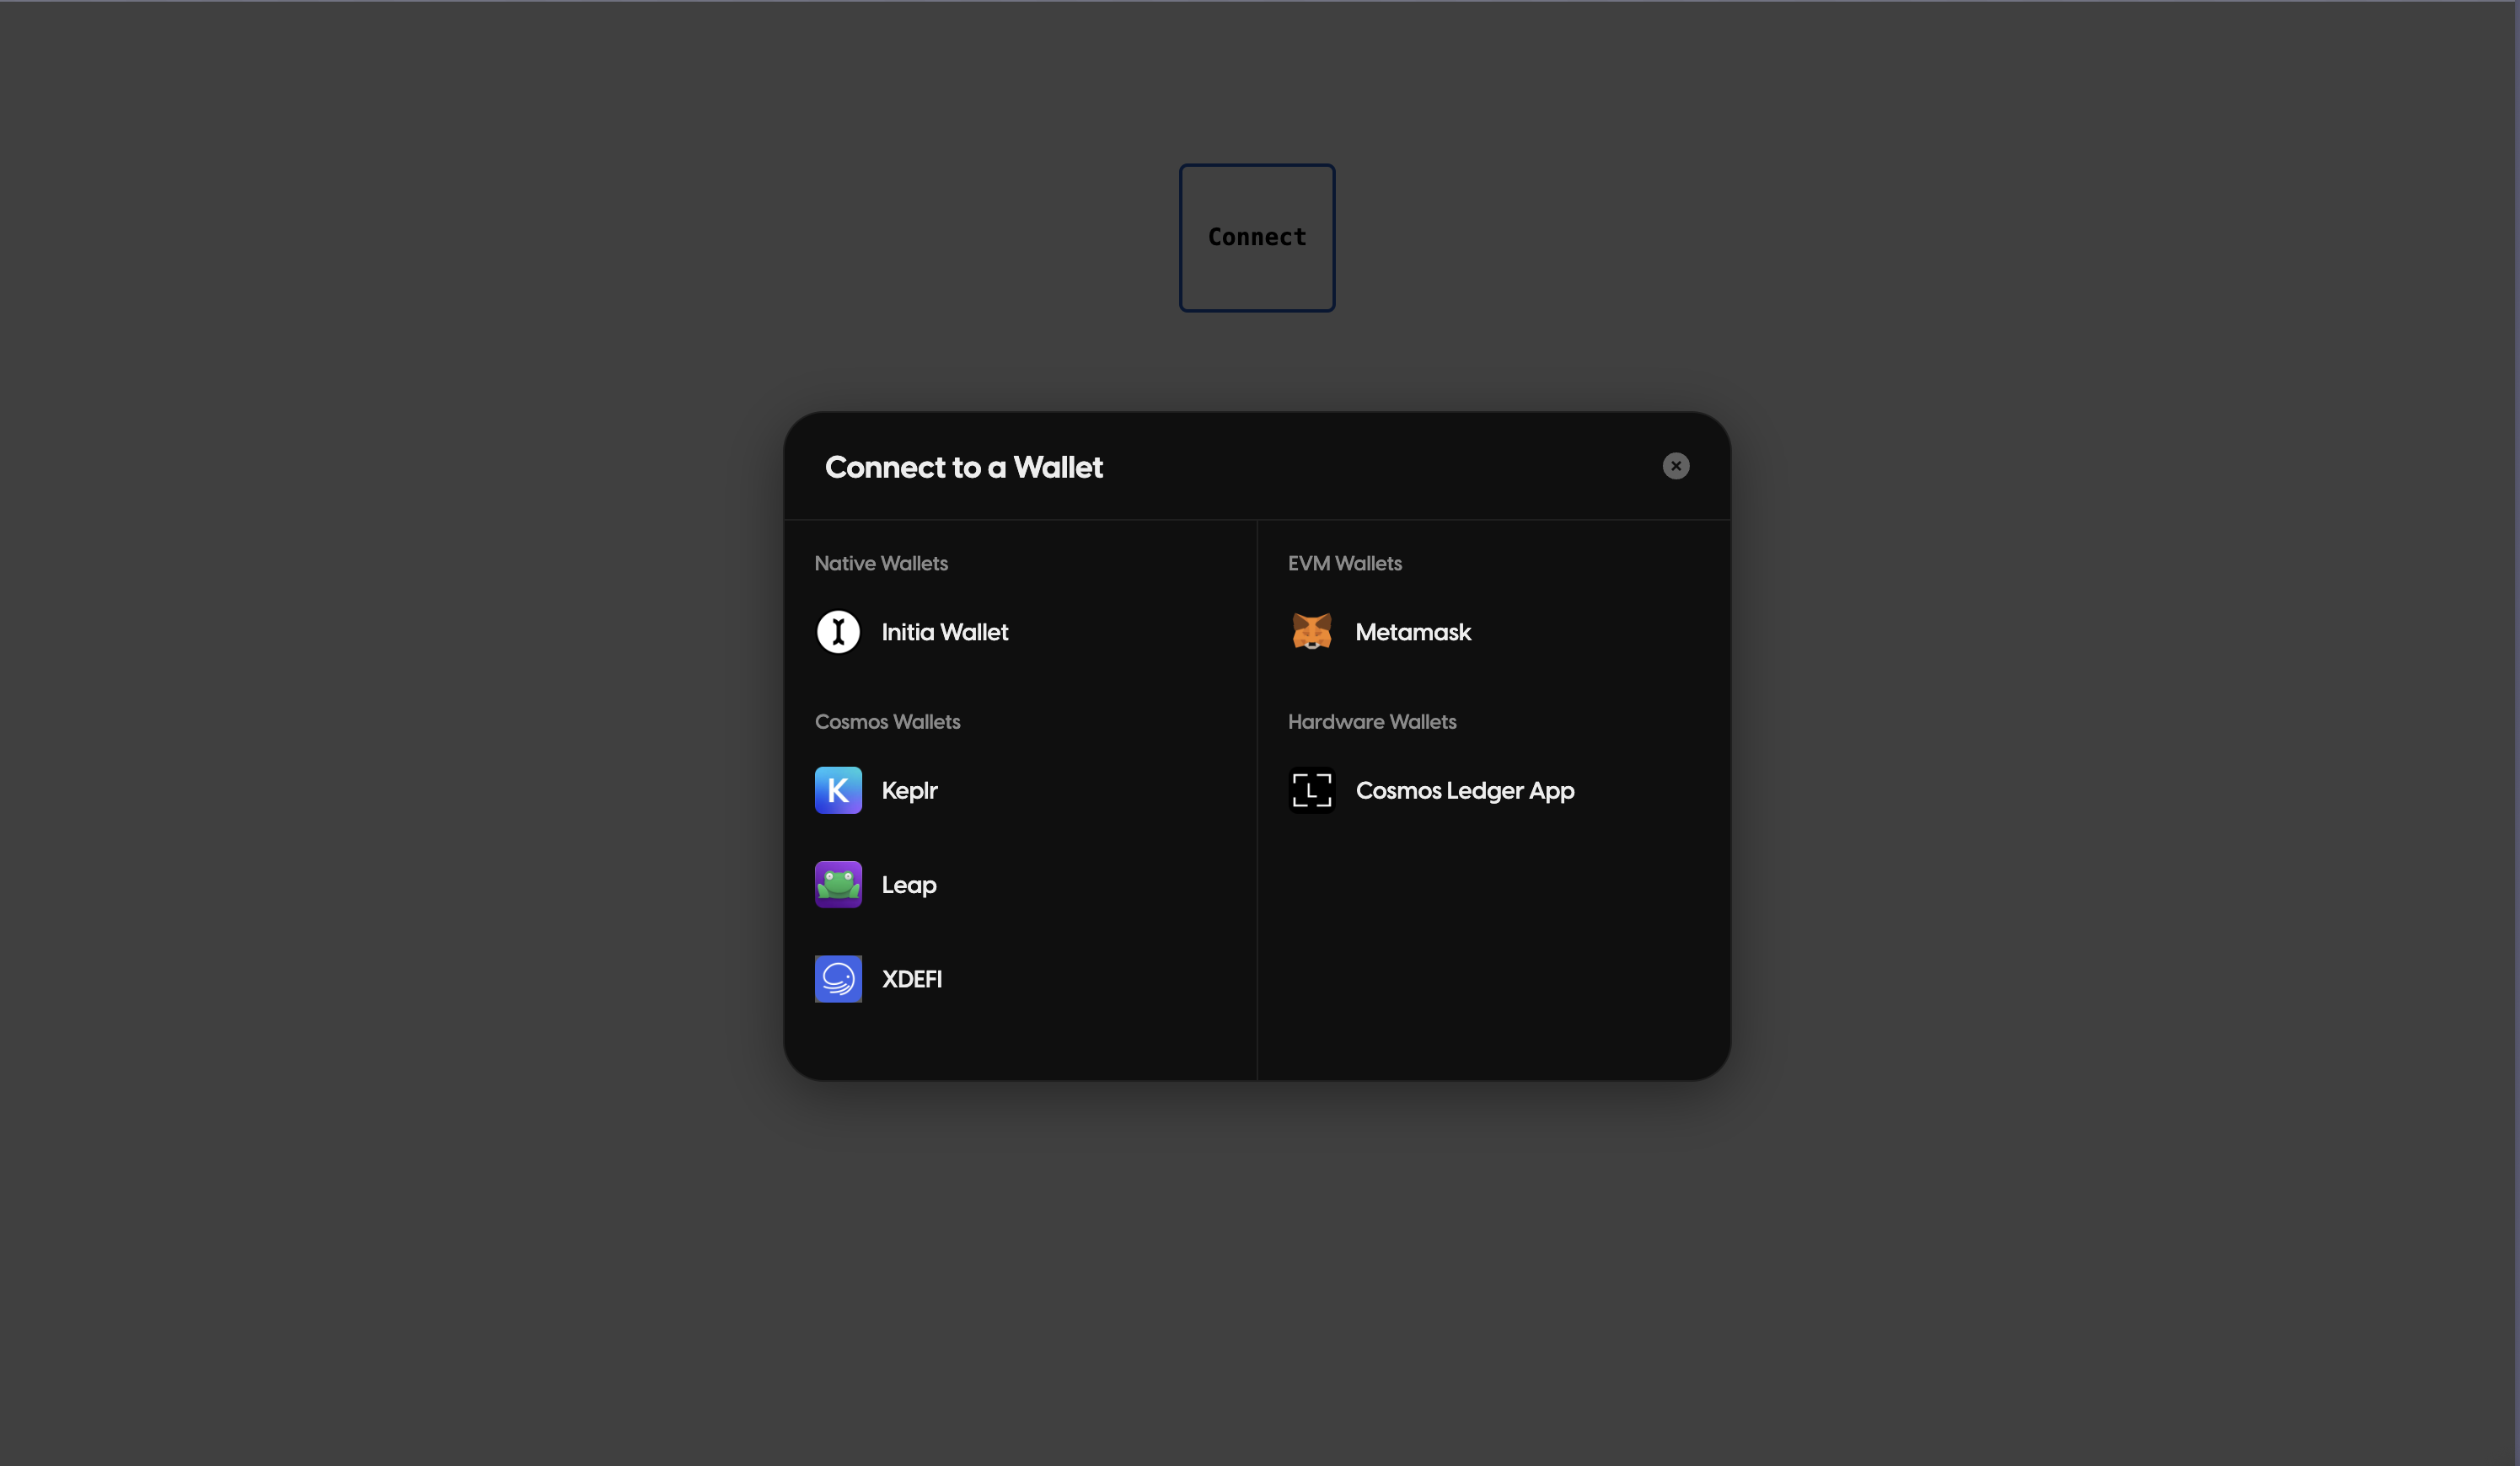
Clicking on “Connect” will open the wallet selector
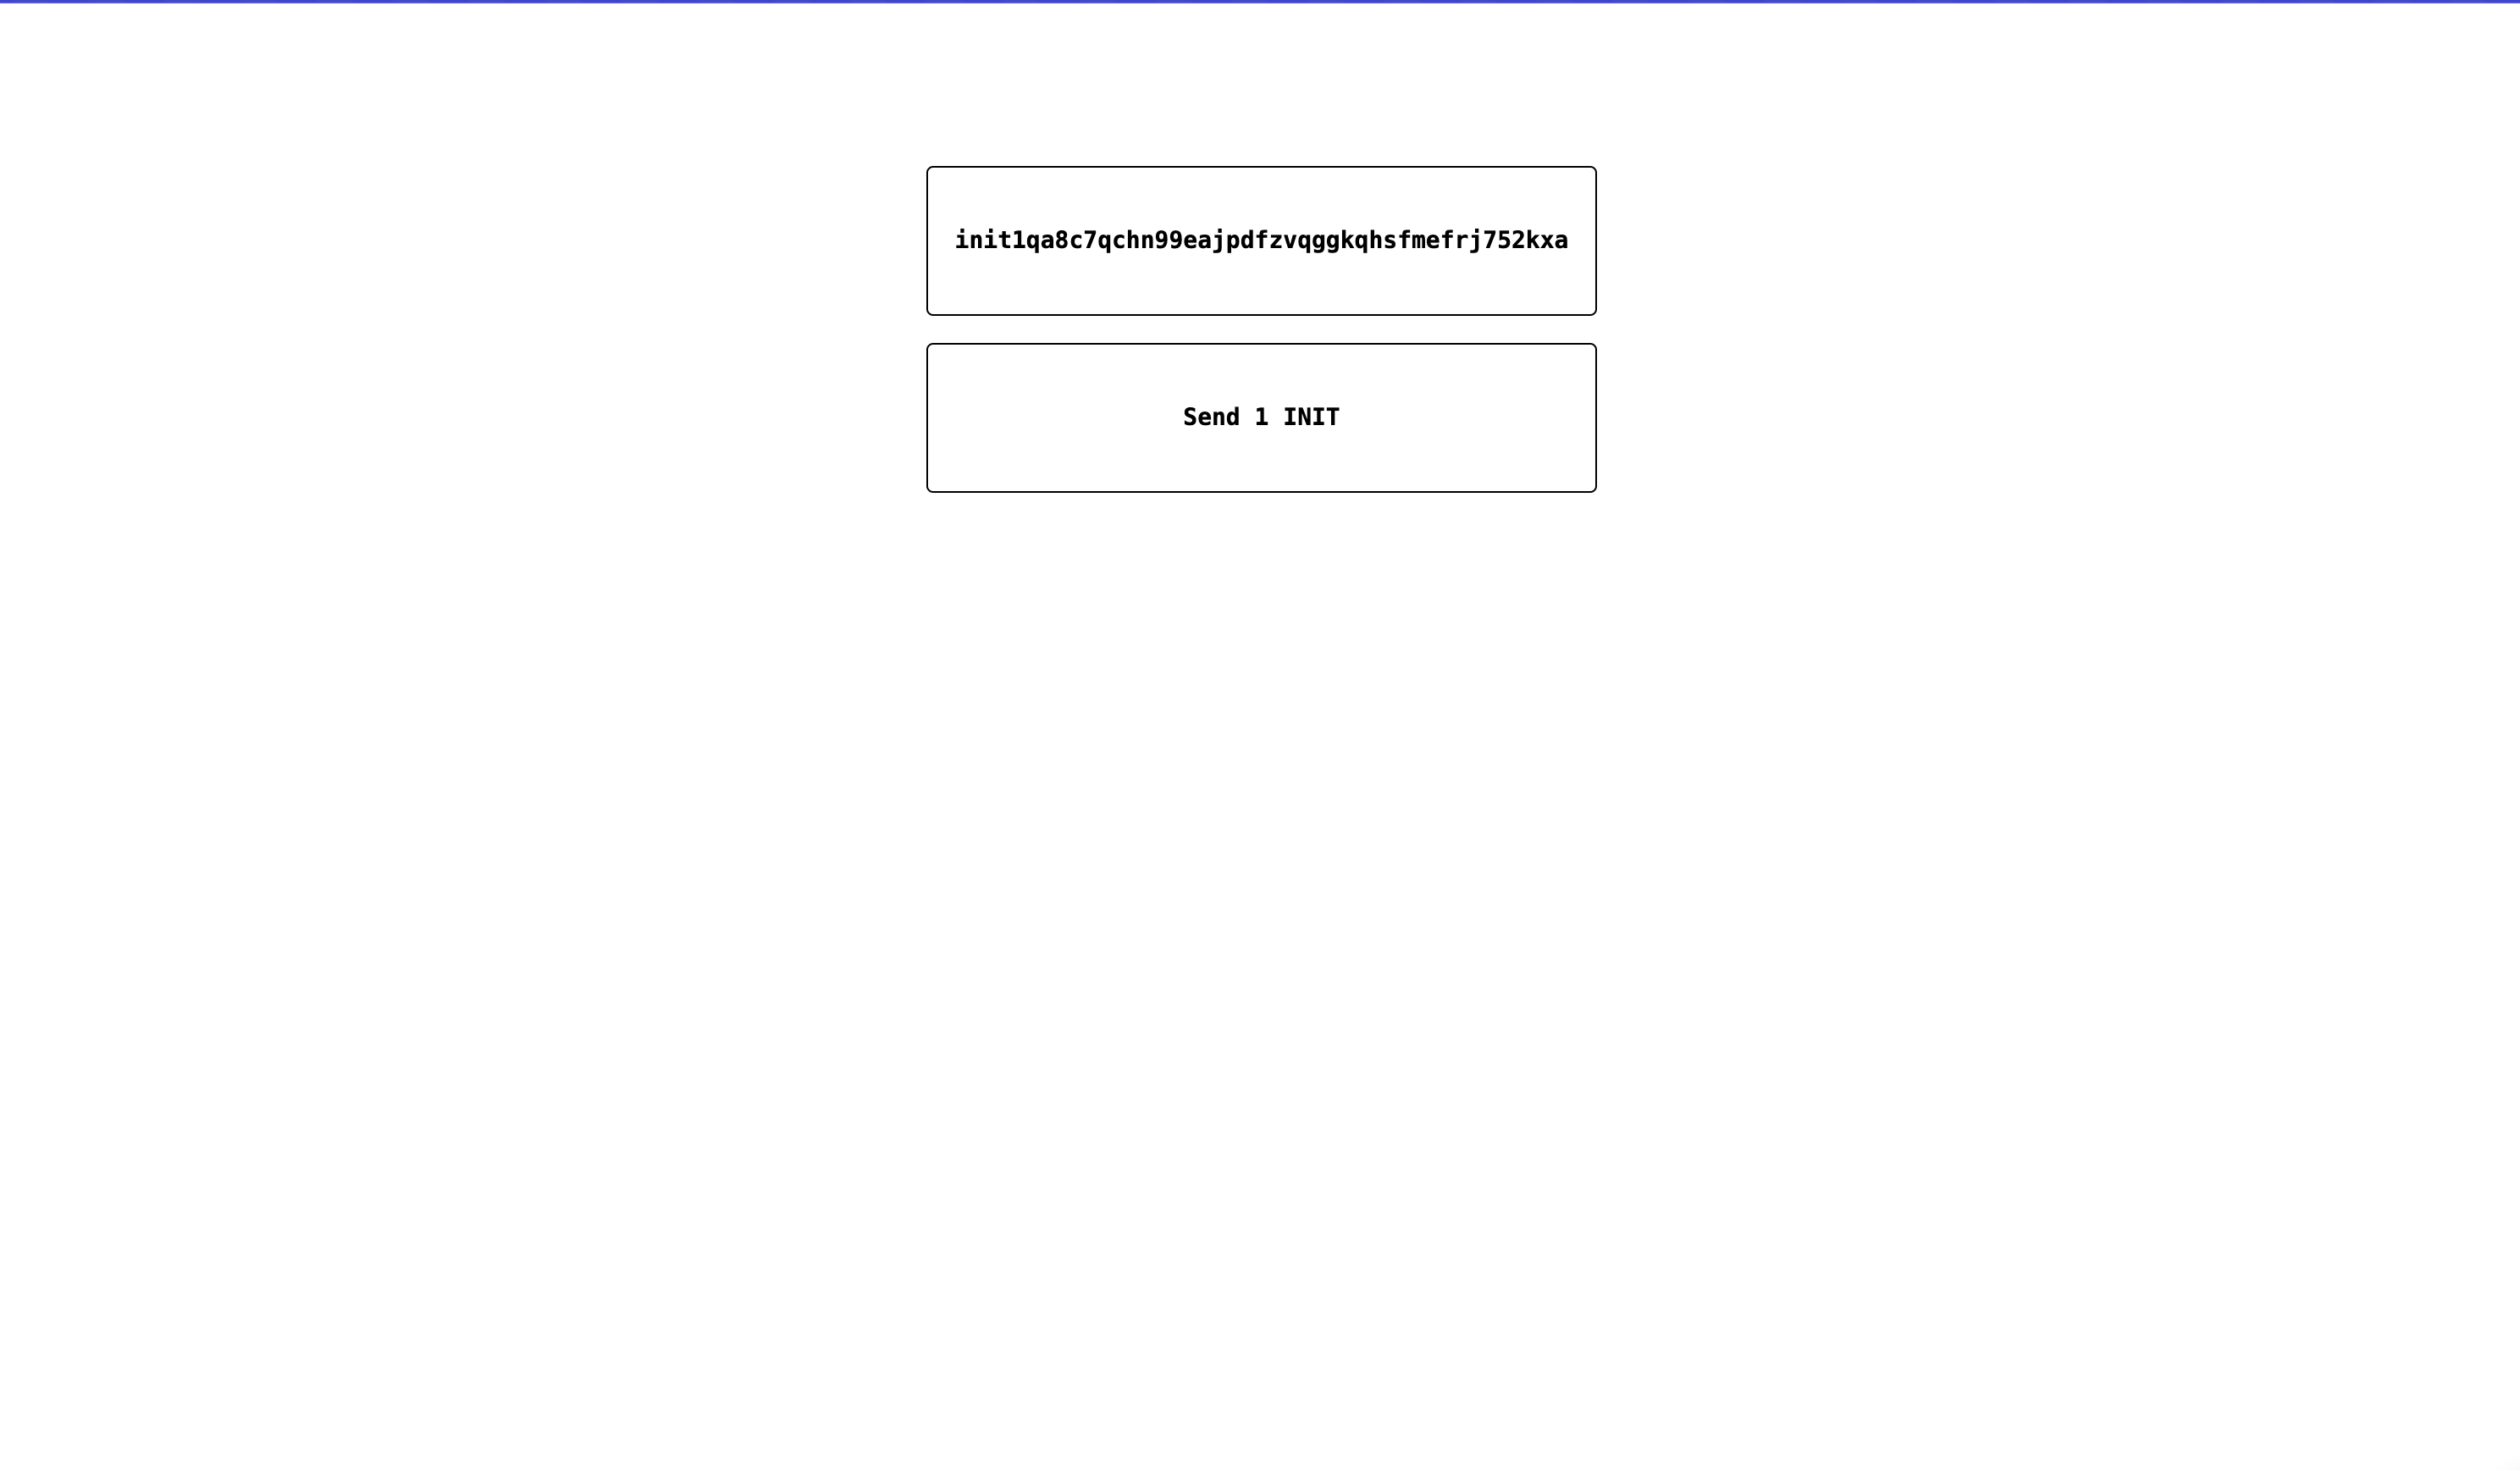
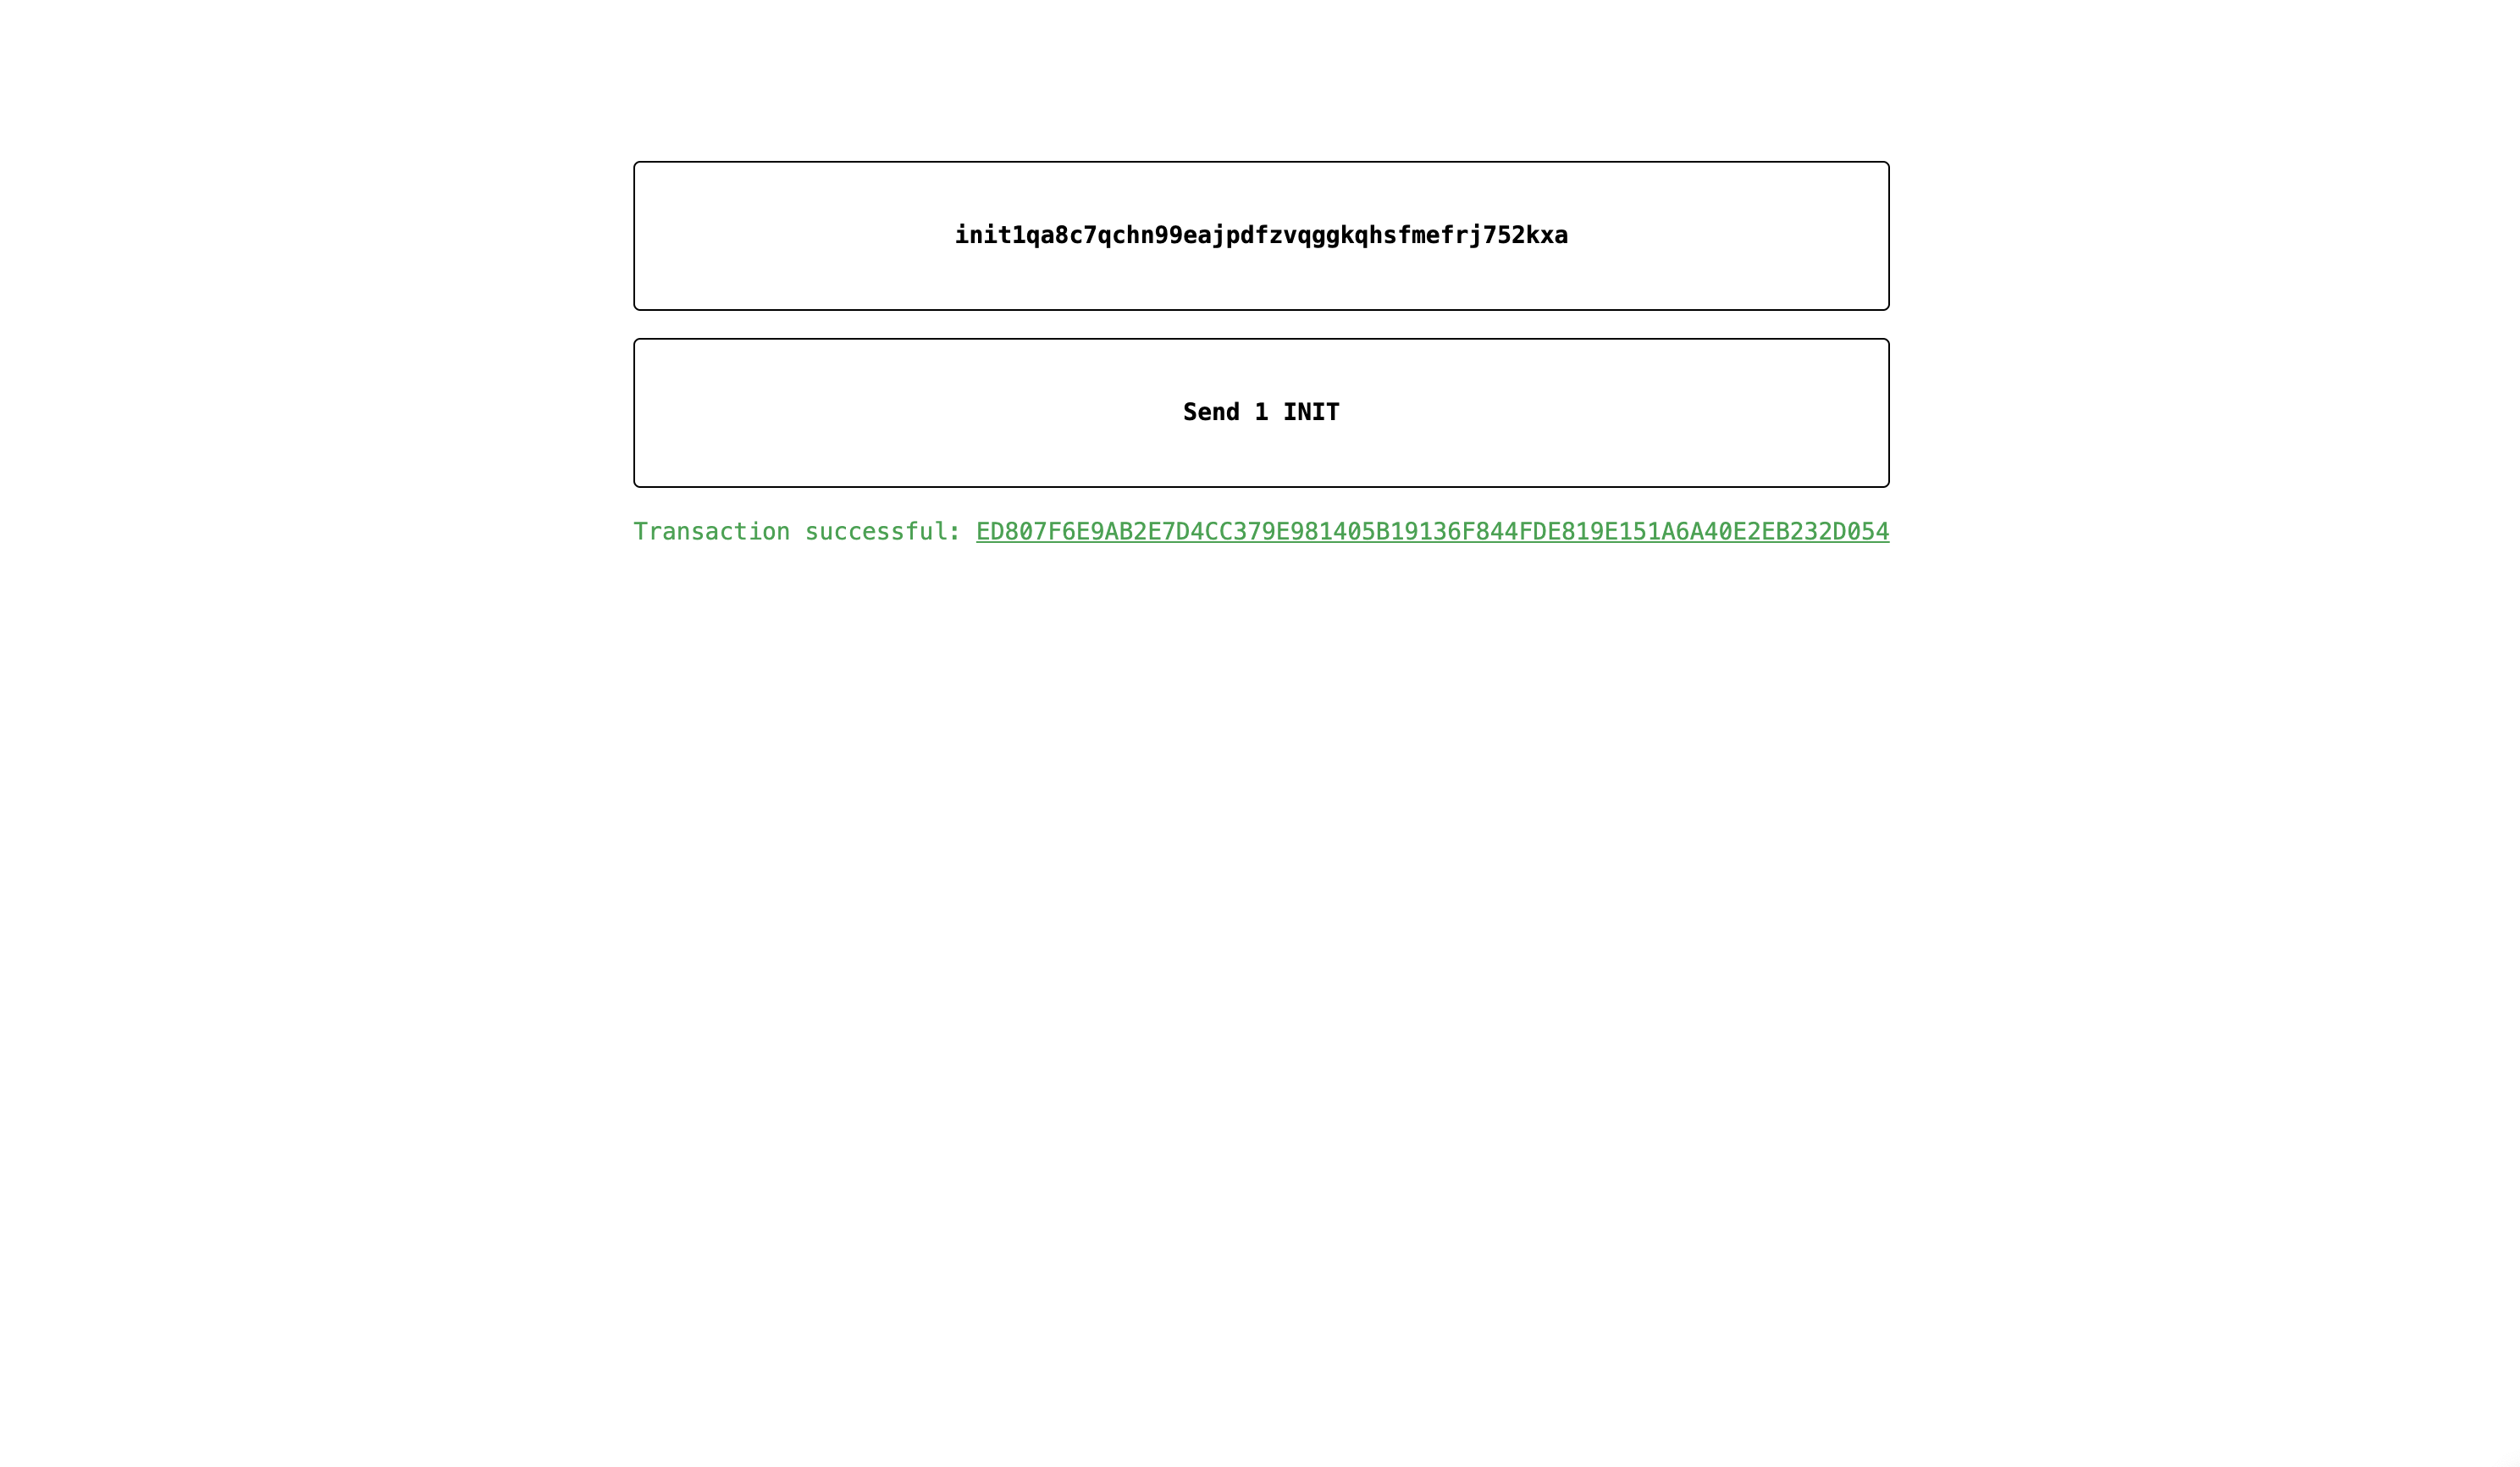
Once a wallet is connected, clicking on “Send 1 INIT” will send a transaction to the wallet.
Once the transaction is sent, the transaction hash will be displayed in the interface.
And that’s it! You have successfully integrated the Initia Wallet Widget into your NextJS project. You can further extend this example in various ways, such as:
Showing the user’s INIT balance when the wallet is connected.
Preventing the user from sending transactions if they do not have enough INIT balance.
Allowing users to specify the amount of INIT to send and the destination address